DIYtheme’s Thesis Theme for WordPress is one of the best overall themes you can use in your WordPress applications. Thesis offers all the SEO elements you need, incredible design flexibility, and because it is completely CSS driven, a WordPress site running Thesis provides lightning-fast loading times. It’s only downfall? It’s pretty plain looking out-of-the-box.
This post will reveal some simple steps one can take to customize Thesis, providing your WordPress driven web site a custom look and feel.
Before you can customize anything in Thesis, you will need to change the name of the folder where the ‘custom.css’ and ‘custom_functions.php’ reside. These two files, when customized, help determine how Thesis functions as well as how it appears. By default, the folder which resides in the theme folder itself (i.e. /wp-content/themes/thesis_18/) is named ‘custom-sample.’ Simply change it to ‘custom’ and you will be on your way to customizing Thesis.
Additionally, I recommend adjusting three default settings within the Thesis Design Options admin panel within WordPress itself.
1. Under the HTML Framework option, select “Full-width framework”
2. Under the Outer Page Padding option, select “0.0”
3. Under the Body (and Content Area) option, uncheck the “Show interior layout borders” option
Header Above Navigation / Custom Footer
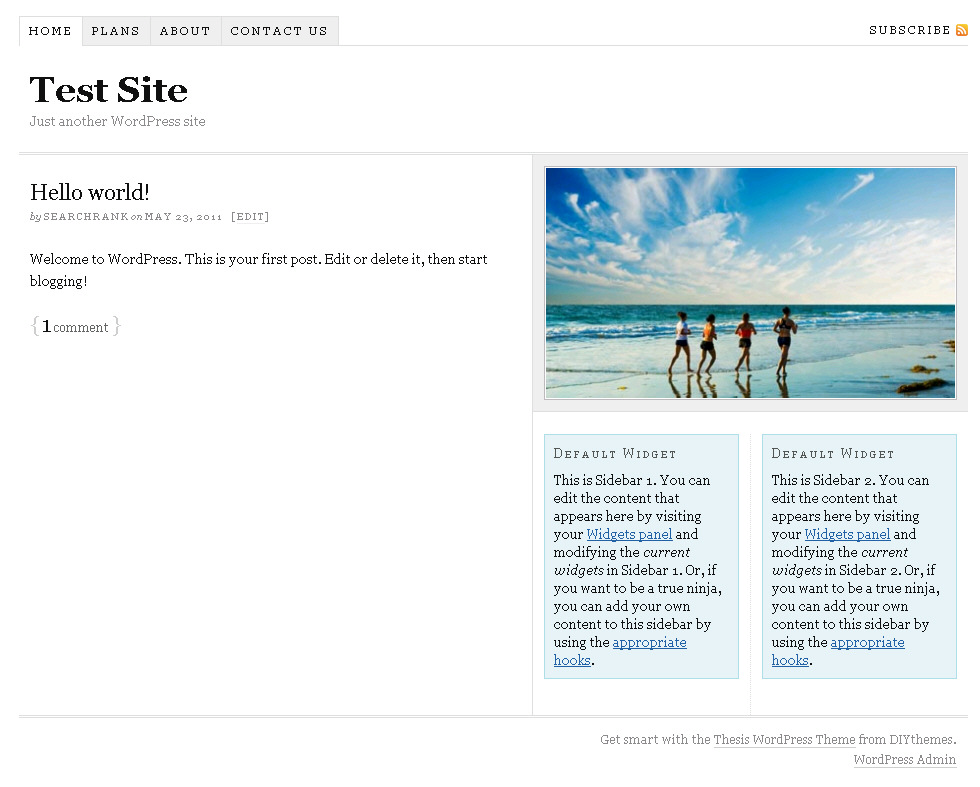
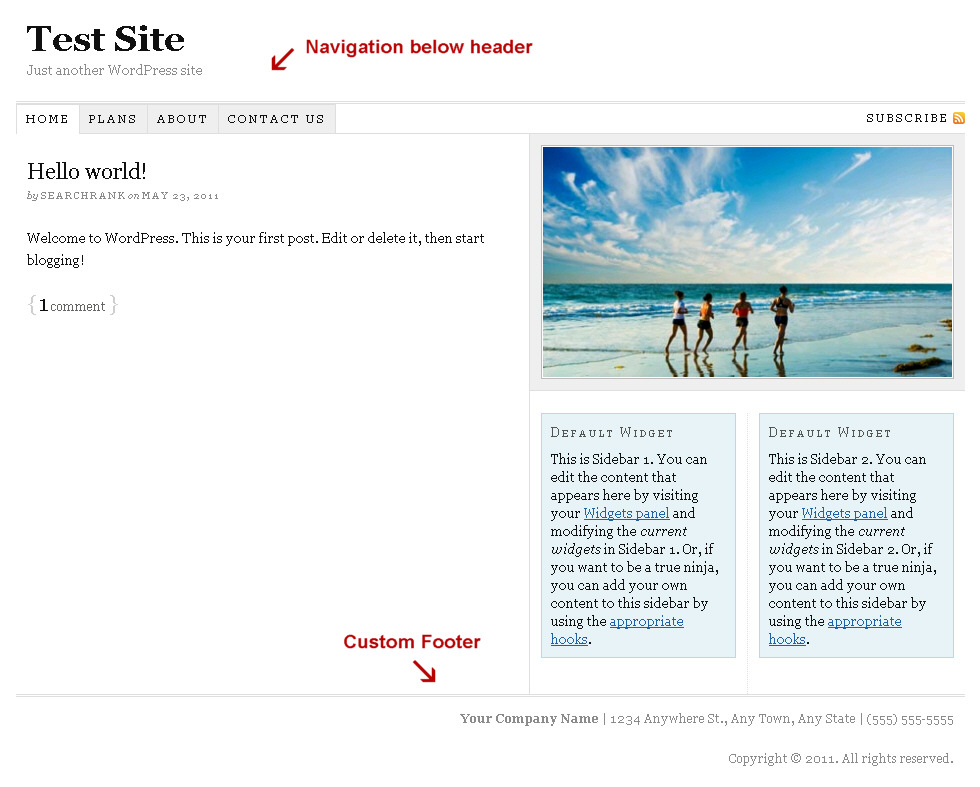
One of the very first things that needs to be done, at least in my opinion, is to fix the scenario where the navigation appears above the header. This is poor usability in my mind’s eye but easily fixable. At the same time, we will also allow you to customize the footer area of your site.
Within the Thesis / Custom File Editor option within WordPress, select the custom_functions.php file and click on the “Edit selected file” button. Once you do this, you will see the default code of that file.
Do not delete any of the existing code but rather on a new line at the bottom, add the following:
remove_action(‘thesis_hook_before_header’, ‘thesis_nav_menu’);
add_action(‘thesis_hook_after_header’, ‘thesis_nav_menu’);
remove_action(‘thesis_hook_footer’, ‘thesis_attribution’);
add_action(‘thesis_hook_footer’, ‘custom_footer’);
function custom_footer() {
?><p><b>Your Company Name</b> | 1234 Anywhere St., Any Town, Any State | (555) 555-5555<br>
<br>
Copyright © 2011. All rights reserved.</p><?php
}
The first two lines reverse the navigation appearing before the header while the next three remove Thesis attribution and allow for a customized footer. Finally add your customized html which will populate the footer area of your site. You may copy the code above directly but be sure to add your own details to the footer html (i.e. company name, address, etc.).
Thesis Before Change
Embed a Flash Header
If you would like to incorporate a Flash file (.swf) in your header area as opposed to a boring .jpg or .gif image, add some additional code in the custom_functions.php file. The code looks like this:
function fancy_pants_flash() {
?>
<object width=“980” height=”140″>
<param name=”movie” value=”header.swf”>
<embed src=”http://www.yourdomain.com/wp-content/themes/thesis_18/custom/images/header.swf” width=”” height=””>
</embed>
</object>
<?php
}add_action(‘thesis_hook_after_title’,’fancy_pants_flash’);
Be sure to change the <embed> section above to include your domain and the actual name of your Flash file as well as the correct size (areas in bold).
Also be sure to add the following code to your custom.css file:
.custom #header #logo { text-indent: -9999px; }
.custom #header #tagline { text-indent: -9999px; }
This will move the default WordPress ‘Site Title’ and ‘Tagline’ off into oblivion.
Add Custom Header (non-Flash)
If you simply want to add a graphical header to your Thesis theme, first develop the graphic and save in either .jpg, .png or .gif . Remember the size of the image itself as you will need that information when modifying the custom.css file in Thesis.
Then add the following code:
.custom #header {padding-top: 0; padding: 0;}
.custom #header #tagline { text-indent: -9999px; }
.custom #logo a {display: block; width: 900px; height: 140px; background: url(‘images/header.jpg‘) no-repeat center; text-indent: -9999px}
Remember to change the actual size and location of image (areas in bold).
Custom Background
While Thesis allows you to choose your sites main background color, it does not allow you to upload a background image. Insert the following code to accomplish this.
body.custom {background: url(‘images/bg.jpg’) 100% 0 no-repeat;}
Remember to change the actual location of image (areas in bold).
Navigation Menu
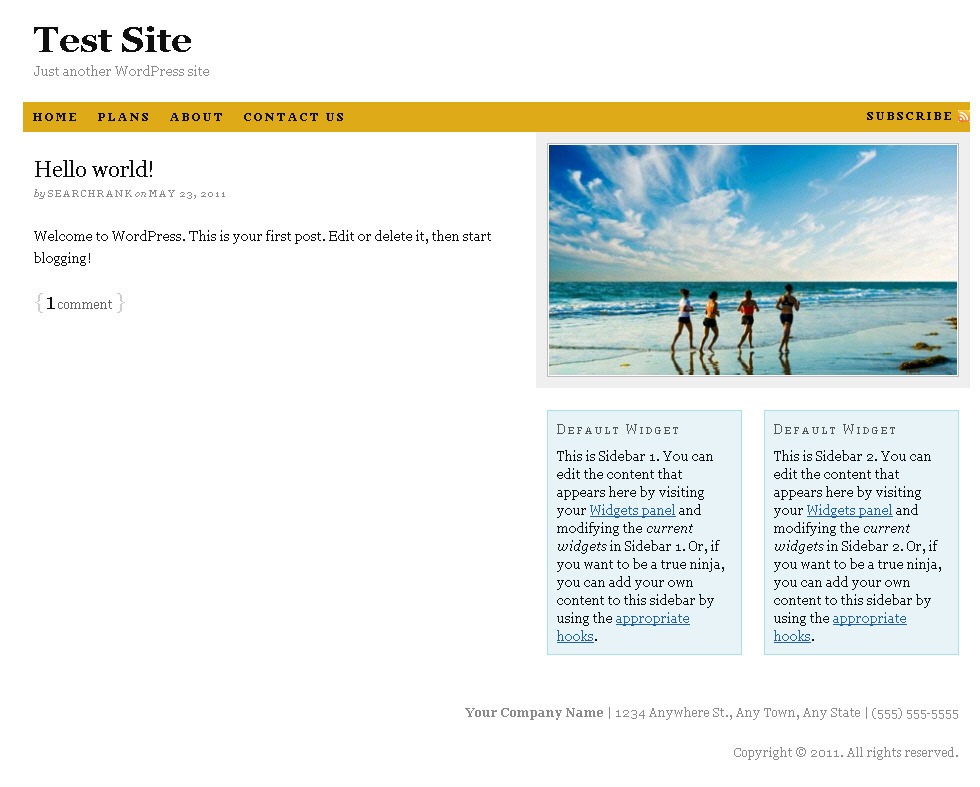
With some simple edits to the custom.css file, you can better control the Thesis navigation menu bar. Thesis itself allows you to control the color, text style and size as well as hover effects, however if you want a main color to run the full width of the site, you’ll have to add the following line of code to the custom.css:
.custom .menu {padding: 0 0; font-weight: bold; background: #FFFFFF;}
Notice that I am also able to set the padding and font weight here, something you cannot do within the Thesis controls. Change the background color settings to your preference.
Content Box
“Content Box” in Thesis refers to the area where your main content appears. There are several things you can do to customize as well as improve this area.
Left Padding
For starters, I hat how close Thesis places text the the left edge of your theme. You can adjust this by adding the following code to the custom.css file:
.format_text {padding-left: 1.0em;}
Adjust the ‘padding-left’ to your liking.
Background
Another problem I see with Thesis in Internet Explorer (no I do not use IE) is that it does not display the background color properly if you are using a different site background color or image. This is especially true if your sidebars are a different color than the content area.
To remedy this, I create a .gif image that serves as the background color for both the content box and sidebar. I make the image about 5 pixels in height and then the length is determined by the total width of the site. I then insert the following code into the custom.css file:
.custom #content_box {background: url(‘images/cabg.gif‘) repeat-y right top;}
Remember to change the actual location/file name of the image to your own (areas in bold).
Header/Heading Tags
If you want to control how your headings (i.e. H1, H2, etc.) appear, simply add the following code to the custom.css file:
.custom #content h1 {font-size: 16pt; font-weight: bold; line-height: 1.1em; color: #000000;}
.custom #content h2 {font-size: 14pt; font-weight: bold; line-height: 1.1em; color: #000000;}
Add as many or as few as you like.
Link Hover Colors/Effects
If you want to have different hover effects and colors for hyperlinks withing content, simply add the following code to the custom.css file:
.custom #content a {text-decoration: underline; color: #FEFEFE;}
.custom #content a:hover {text-decoration: none; color: #FFFFFF;}
Adjust effects and colors to your preferences (areas in bold).
Sidebars
Like the link hover color/effects tweaks for the content box in Thesis, here is some code to accomplish the same thing in the sidebars.
.custom #sidebars a {text-decoration: underline; color: #FEFEFE;}
.custom #sidebars a:hover {text-decoration: none; color: #FFFFFF;}
Footer
Hover color/effects tweaks for the footer:
.custom #footer a {text-decoration: underline; color: #FEFEFE;}
.custom #footer a:hover {text-decoration: none; color: #FFFFFF;}
Additionally, if you are like me and want to have control over the background color of your footer as well as text alignment, utilize the following code in the custom.css file:
.custom #footer {padding-bottom: 1.1em; text-align: center; background: #000000;}
Adjust text-align and background colors to your preferences.
Finally, something that really bugged me about hyperlinking to anything in the footer would place an underline under the linked text, even if I designated ‘none’ in the text-decoration field. I finally found a simple line of code that removes the underline.
.custom #footer a {border-bottom:none;}
=====================================
I’m sure there are many additional ‘tweaks’ that can be done to customize this amazing WordPress theme and would love to hear about them in the comments section of the post. What I have included here are simply some I have utilized in my own sites.


